
Originally posted on Medium.
I recently came back to freeCodeCamp to finish off the front-end development certification projects. Rather than just rushing through them, I decided to use each project as an opportunity to experiment with something new. For the "Show The Local Weather" project I combined React with TypeScript and documented the process as a tutorial.
The motivation came from evaluating Angular 5 versus React. I prefer React's simplicity, but I appreciated Angular's use of TypeScript. TypeScript adds static typing and other features that are missing from vanilla JavaScript — even with ES6/7 enhancements. This project let me have the best of both worlds.
For weather data I chose the Wunderground API because it provides temperature readings in both Fahrenheit and Celsius as well as weather condition icons, which reduces implementation complexity.
Step 0: Set Up
create-react-app weather --scripts-version=react-scripts-tsnpm install --save core-decorators
After generating the project, enable experimental decorators in tsconfig.json:
{"compilerOptions": {"noUnusedLocals": true,"experimentalDecorators": true}}
The project folder structure looks like this:
weather-app/├─ .gitignore├─ node_modules/├─ public/├─ src/└─ assets/| -- loader.svg| -- logo.svg└─ components/| -- Weather.tsx| -- WeatherDisplay.tsx└─ styles/| -- App.css| -- WeatherDisplay.css| -- index.tsx| -- registerServiceWorker.ts| -- App.tsx| -- index.css| -- config.ts| -- types.ts├─ package.json├─ tsconfig.json├─ tsconfig.test.json└─ tslint.json

Step 1: Styling
I reskinned the default create-react-app styles using freeCodeCamp's green theme. The styling files are available in the project's GitHub repository.
Step 2: Configuration
TypeScript lets you annotate primitive types (string, number, boolean) and define custom object types. For example, the WeatherData type with a nested DisplayLocation:
Step 3: React Components
I used the presentational/container component pattern. The WeatherDisplay component demonstrates React.Fragment — a wrapper that doesn't render any actual HTML element. Interfaces define the shape of props and state using angle-bracket syntax: <Props, State>.
Decorators use the @ symbol. The @autobind decorator automatically binds this to class methods, removing manual binding boilerplate:
// With arrow function — no binding issueclassMethod = () => {console.log("when you use arrows, you don't have to worry about the keyword 'this'");};// Without — binding requiredclassMethod() {console.log("because of javascript, you have to worry about the keyword 'this' here");}
The Weather container component manages API calls through async operations. getCurrentPosition returns a Promise, ensuring geolocation completes before fetching weather data. Optional type properties are marked with ? in interfaces.
Step 4: Complete
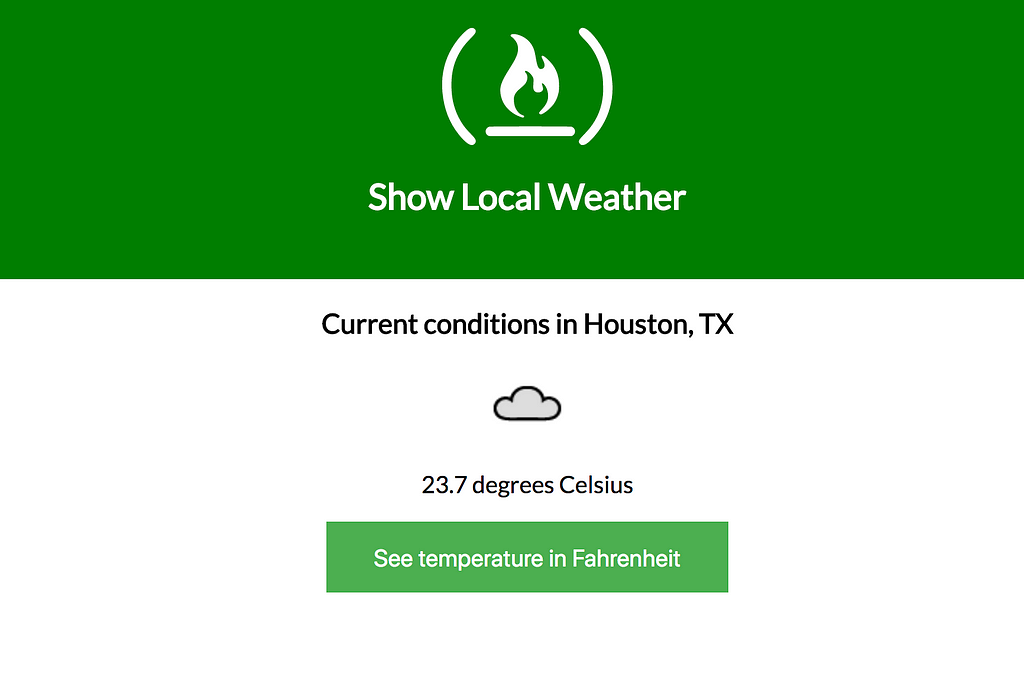
The finished product shows local weather at the user's current position. Future improvements could include location search functionality and additional UI enhancements.
TypeScript's biggest benefit here was the security of static typing — code won't compile if types mismatch, catching errors before runtime.